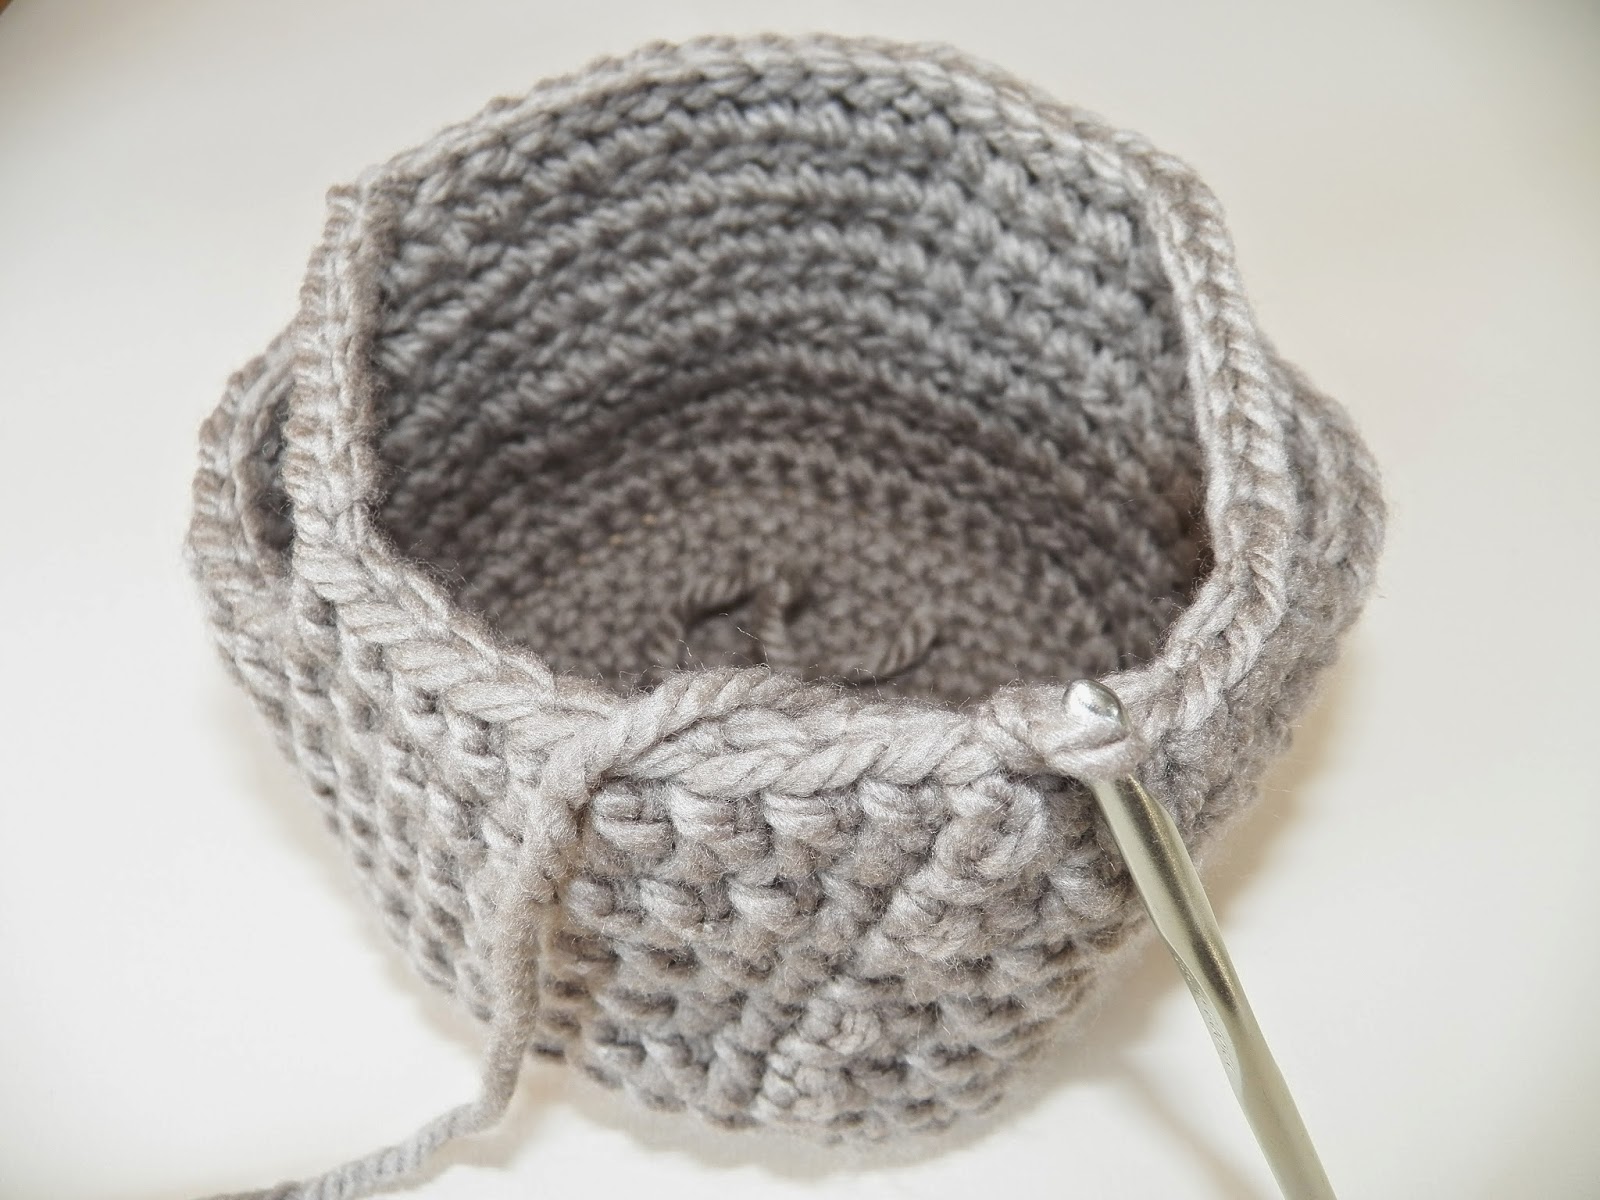
This is the first crochet pattern I have written. If there are errors or confusing bits, please let me know. Also, there are many patterns for crochet baskets out there. This pattern is entirely my own, but if it resembles yours or another that you've seen, it's probably because this is how you crochet a basket, sooooo they're all going to be very similar, right? If you choose to use my basket pattern above all the others out there in cyberspace, wow! thanks! If you Pin it, or write or blog about it, kindly link back to here! Thank you!
Crochet Basket Pattern with Pictures
from ordinarylovely.blogspot.com
You will need:
* super bulky weight yarn (#6), approx. 95 yards. (For the basket pictured here I used about 3/4 of a skein of Bernat Softee Chunky in "Clay".
* size J (6 mm) crochet hook
* stitch marker
* tapestry needle for weaving in the ends
* embellishments if desired
(The roses in the photos were a from this simple pattern at PlanetJune. I used a 3.75mm hook and only chained 36 to achieve a smaller flower.)
Abbreviations used:
sc - single crochet
dc - double crochet
ch - chain
sl st - slip stitch
inc - increase
The entire basket is worked in rounds. You will never turn your work.
Tip: obviously, this is a flexible basket, but the tighter you crochet this, the sturdier it will be!
Rnd 1: Start with a magic ring. Ch 1. Work 6 sc into ring. Pull string to close ring.
(here is a good photo tutorial on how to make a magic ring.)
Rnd 2: Work 2 sc into each stitch (12 total)
Use a stitch marker to mark the first stitch of each round. Bottom of basket will be worked in spiral rounds with no joining stitches.
Rnd 3: * 1 sc, inc * around (18 stitches total)
(for the bottom of the this basket, the "inc" is working two single crochet into one stitch.)
Rnd 4: * 2 sc, inc * around (24 stitches total)
Rnd 5: * 3 sc, inc * around (30 stitches total)
Rnd 6: * 4 sc, inc * around (36 stitches total)
Rnd 7: * 5 sc, inc * around (42 stitches total)
Rnd 8: * 6 sc, inc * around (48 stitches total)
Rnd 9: (starts the sides of basket) sc into the back loop only of each stitch around (48 stitches total)
(this is the only round in which you will crochet through just one loop.)
No need for the stitch marker anymore. The sides of the basket will be joined.
Rnds 10 - 15 : Ch 3, dc into next stitch and each stitch around. Join with a sl st to the top of the beginning ch 3. (these and all remaining stitches will be through both loops.)
Rnd 16: Ch 3, 8 dc, ch 9, skip 8 stitches, 17 dc, ch 9, skip 8 stitches, 7 dc, join with a sl st to the top of the beginning ch 3.
Rnd 17: Ch 1, sc until you get to the chain, 12 dc onto the chain (in the space, not in the individual stitches), sc around to the next chain, 12 dc onto the chain, sc to the end, join with a sl st, finish off, weave in the end. (For an "invisible" finish, check out this tutorial here. scroll down to "invisible finish")
You're done!
I like to use my baskets to carry my crochet projects around and to store my prayer books. My kids have confiscated the baskets that I've made "for myself" and have found a dozen different uses for them, including toy storage bin, purse, and ridiculous looking hat.


So cute!! Do you think a total beginner could attempt this? (ie. Me?!) Once this baby blanket is done, I am going to try!
ReplyDeleteI definitely think you'll be able to do it. And if you need some clarification, I can always help at crochet group. Er, I mean, prayer group ;)
DeleteYes, I think a class is in order :)
DeleteYour a marvel - how cute are they! I wish I could crochet, I just love these!
ReplyDeleteYou created this?!? That is so cool! They are beautiful. I love the color and the ribbon detail.
ReplyDeleteI love this basket! Simple, yet gorgeous! I love your ideas for adding ribbon or roses!
ReplyDeleteI have included this pattern in my Easter Basket round up! http://blackstonedesigns.blogspot.com/2015/03/easter-basket-round-up.html
Tks. !!!
ReplyDeleteHelp! I'm confused as to the reason for chain 3 at the start of rows 10 to 15. Its giving me a hole as I go around. Thanks for clarifying!!
ReplyDeleteThe chain brings you up to the next round. If it's leaving too big of a gap, you could try chaining two instead :)
DeleteThis comment has been removed by the author.
ReplyDelete