Showing posts with label tutorial. Show all posts

Wednesday, May 20, 2015

Crochet Afghan Repair

Remember how last year I made my first crochet blanket?  It was my first large-scale project, and I love that blanket.


Back in March, the unthinkable happened.  One of my children pointed out that it had a hole in it.  A man-made hole.  Who are we kidding... "child-made" would be the appropriate terminology in this case.  Someone struggling with curiosity and self-control snipped my afghan with a pair of child-safe scissors, which, if you were wondering, most certainly are sharp enough to cut yarn.  

I almost cried, but I didn't.  I had already had some other discouraging news that day and didn't feel like crying (or yelling) about something that was done and done.  My face visibly showed my sorrow to my kids though.  I silently folded up the blanket and put it in the first bag I could find - an ALDI bag with handles.  That was probably my first post scissor-disaster mistake.  But I was in shock and wasn't thinking clearly. 

Today I decided two months was long enough for that thing to sit around, damaged, and totally useless.  I missed my blanket, and even though I was nervous to try the repair, I'd certainly never use that afghan again if I didn't at least try.  

I only found one Pinterest item on repairing crochet blankets that suited my needs and I dove in...  I pulled the blanket out of the bag.  UGH!!!  It stunk!  It smelled like urine.  Why did I leave it that bag all those weeks??  Why didn't I sniff the bag before I put my handiwork in there?? (really?? ;) )  Why did that bag smell like urine in the first place??  (that's a stupid question with a mostly obvious answer that is better left unspoken...)


The first thing I did was the scariest part.  I had to make the hole bigger.  I carefully picked out stitches, trying to leave the row above the damaged row as in tact as possible. Once I had pulled out all the loose threads, I pulled out each end of the hole so that the "tails" were long enough for me to work with.  Here's the original hole and then the expanded one...


I tied on a new piece of yarn and tried to figure out the best way to replace the missing row while connecting it to the row above at the same time.  


I'm sure there's a better way to do this than the method I ended up using, but here's what I did...

I inserted my hook in the loop of the last stitch, then before beginning the double crochet I put it through the two loops hanging down from each stitch in the row above.  Hard to explain, but the arrows here point to the loops I'm speaking about.  


Once the hook was through those, I did yarn over, insert hook, pull up a loop, yarn over and pull through the first two loops, yarn over and pull through the four loops on the hook (two of which are the bottom of the stitch from the row above.  This completed the row while anchoring it to the row above.  If I were ever to try a repair again, I might try to just crochet the damaged row first and then slip stitch it to the row above as the means of attaching them...  I don't know...

Finally, I made sure to securely tie off the ends and weave them in very well.  


The results aren't pretty, but I really don't care -- my afghan is usable again!! (just as soon as I Febreeze it, or toss it in the dryer with a scented dryer sheet or something...)  I don't know why I didn't do it sooner; it wasn't as scary as I had made it out to be in my head. 

Today's a bit of a chilly day, so my plans to celebrate my first successful repair involve hot tea, a new episode of Gran Hotel, and cuddling up in my first crocheted and first repaired blanket!  


Tuesday, February 10, 2015

The Snow on Snow Chunky Crochet Button-Up Cowl

Today was the first day in ten days that we haven't had additional snow accumulation.  I actually like snow, but new snowfall every day for nine days gets a little tiresome.  All throughout the past week the poem (and Christmas carol) In the Bleak Midwinter, by Christina Rossetti, kept running through my mind, particularly the first verse...

In the bleak mid-winter
Frosty wind made moan,
Earth stood hard as iron,
Water like a stone;
Snow had fallen, snow on snow,
Snow on snow,
In the bleak mid-winter
Long ago.

While my husband and sons were out repeatedly shoveling and snow blowing, I was working out this quick and simple pattern.  It was fitting that I called this project the Snow on Snow Cowl :)


Um... awkward.  I will never be comfortable taking pictures of myself.  How come everyone else on the interwebs can do it??  I ended up taking a whole bunch of pictures in front of a mirror and picking the least awful after having asked one of my children to do it and ending up with a lot of blurry pictures of my chest.   Have any tips on taking not-awkward selfies or other appropriate pictures to show off your crochet creations without buying a plastic head from a craft store??  Send em my way :)  

For this project, you'll need:

1 1/2 skeins Lion Brand Yarn Wool-Ease Thick and Quick yarn.  (I used "Glacier")
10 mm crochet hook
tapestry needle for weaving in the ends
two large buttons
needle and thread 

I wanted my cowl to have some texture to it, but I didn't want it to have gaps in between the stitches.  I wanted it to be seriously warm for wearing under my coat out in all this snow.  After trying several ideas, I decided to just use the same stitch that I used for my cotton dishcloths, so perhaps that's why it looks familiar :)  


Pattern:

Row 1.  loosely chain 17 (or 15 if you want the cowl to be shorter.)

Row 2. Turn. 1 half double crochet (hdc) in second chain from the hook, 1 slip stitch (ss) in next chain.  *1 hdc, 1 ss* until the end. 

Row 3 - 50?  Turn, chain 1.  *1 hdc, 1 ss* to the end.  (note: every row will start on a half double crochet and end with a slip stitch.)   (Mine was 50 rows long, you may add or subtract rows to achieve the length you want.)

Continue until the cowl is long enough to fit around your neck with approximately two inches of overlap.  

Once you have reached the desired length, chain one and begin to single crochet around the edge of the entire piece, using three single crochets at each corner.  

Slip stitch into to the starting chain one.  Finish off and weave in the ends.  

Sew two large buttons on the two corners of one end.  Use the natural holes in the crocheted piece to button the cowl closed.  

You're done!  Stay warm :)


all kinds of awkward...

... but at least I'm toasty warm :)

Wednesday, January 21, 2015

My Glorious Spectrum of New Crochet Dishcloths! (and a not-a-pattern)

My old kitchen dishcloths were literally falling to pieces.  (I believe you can view the photo evidence here.)  So as soon as my Christmas crocheting was done, I set to work and made a lovely array of dishcloths for myself (using mostly cotton I already had on hand...)  For me, it feels do different making something for myself, as opposed to a gift.  It doesn't feel rushed and I don't pressure myself to make it "perfect."   

I love having useful homemade things around the house.  And I smile at the idea of seeing spilled milk on the table, or a little face covered in pasta sauce, and reaching for something pretty I made to tend to it :)  I'm looking forward to putting these cheerful cloths to use!  


I mentioned earlier that when I'm making things for my own use, I don't pressure myself to make them perfect.  These dishcloths are perfect, though...  

As a special treat, I have for you a guest!  - an average housewife whom I've selected at random* to try out these dishcloths and give you her honest opinion.  (never mind that we might have the same maiden name and may occasionally be seen together in facebook photos or at local restaurants...)  I gave this average housewife whom I selected a random, Sarah, three dishcloths to use in her home for an unspecified amount of time (since her last birthday...)  Here's what Sarah has to say about these cloths:

"These washcloths are the only kitchen cloths you’ll ever need.  First of all, I believe anything hand/homemade very well, is far better than store bought. But the main reason I swear by these washcloths is because they’re made with a wide stitch. When you wet them, they expand a bit so little bits of food don’t get smooshed (an average housewife term, no?) into the fabric. After the first use, rinse, ring, and dry. I typically use a washcloth every 3 days before it ends up in the laundry bin.  Just remember to rinse with hot water and allow for drying time. Lastly, I love these little guys because the patterns and colors Theresa uses are so cute and colorful. I realize we’re talking about a washcloth here, but it can really brighten up your kitchen and mood!" ** 

And there you have it.  Thank you, Sarah!  

* Mega major bonus points to you, dear reader, if you get this reference!  I believe we may have a "Love" in common :)  

** Sarah was not payed for this review.  (Just because you may have seen her leaving my house after dinnertime doesn't mean she's received culinary favors in exchange for this glowing review either...)

*   *   *   *   *   *

If you're interested, I've included a quick recap of how I made these dishcloths.  I can't bring myself to call it a pattern.  It's more of a conversational "here's how I did it" and if you want to follow along and make your own, you're more than welcome to!  

So, want to make some and brighten up your kitchen and your mood?!?!?

You'll need... 


cotton yarn (main color, border/contrast color)
H hook (5.0 mm)
J hook (6.0 mm)
tapestry needle


abbreviations:

ss - slip stitch
sc - single crochet
hdc - half double crochet


Here's what I did...


Row 1: Using main color yarn and the J hook, chain 35.


top side of the starting chain (as opposed to the underside shown below)


Row 2:  Switch to the H hook.

            Turn.  Flip the chain over so that the "bumps" on the  underside are facing up. 

here are the "bumps" on the underside


      1 hdc in the second "bump" from the end (shown by the needle...)


 1 ss in the next "bump." (shown by the needle...)

photo shows the first half double crochet and them "bump" where you'll slip stitch
            Continue working in the "bumps" repeating (1 hdc, 1 ss) to the end.  (you should end on a slip stitch)


Row 3 - ?? Ch 1 and turn.


  Repeat (1 hdc, 1 ss) to the end. 


Each row should begin with a half double crochet and end on a slip stitch.  


Continue with as many rows as it takes to form a perfect square.  


One you have achieved a square, Chain 2, then sc around the entire outside of the dishcloth (except for 3 sc at each corner)  Join to the first sc with a slip stitch.  Finish off and weave in the ends.


Attach contrast color with a knot any place it is convenient.  


Chain 2, hdc around the entire cloth again (3 hdc at each corner.)  Join to the first hdc with a slip stitch.


Ch. 1, sc around the entire cloth (3 sc at each corner).  Join to the first sc with a slip stitch.  Finish off and weave in the ends. 


If I was making these for a gift, I would have blocked them.  
But since they were just for me and I was impatient to get them into my kitchen to brighten things up, I skipped blocking :)

 That's it!  So simple!   Let me know if you have any questions.
It's such a great dishcloth!  Enjoy :)


Friday, April 4, 2014

Crochet Basket Pattern


This is the first crochet pattern I have written.  If there are errors or confusing bits, please let me know.   Also, there are many patterns for crochet baskets out there.   This pattern is entirely my own, but if it resembles yours or another that you've seen, it's probably because this is how you crochet a basket, sooooo they're all going to be very similar, right?  If you choose to use my basket pattern above all the others out there in cyberspace, wow! thanks!  If you Pin it, or write or blog about it, kindly link back to here! Thank you!   

Crochet Basket Pattern with Pictures
from ordinarylovely.blogspot.com

You will need:

* super bulky weight yarn (#6), approx. 95 yards.  (For the basket pictured here I used about 3/4 of a skein of Bernat Softee Chunky in "Clay". 

* size J (6 mm) crochet hook

* stitch marker 

* tapestry needle for weaving in the ends

* embellishments if desired
(The roses in the photos were a from this simple pattern at PlanetJune.  I used a 3.75mm hook and only chained 36 to achieve a smaller flower.)

Abbreviations used:

sc - single crochet
dc - double crochet
ch - chain
sl st - slip stitch
inc - increase 

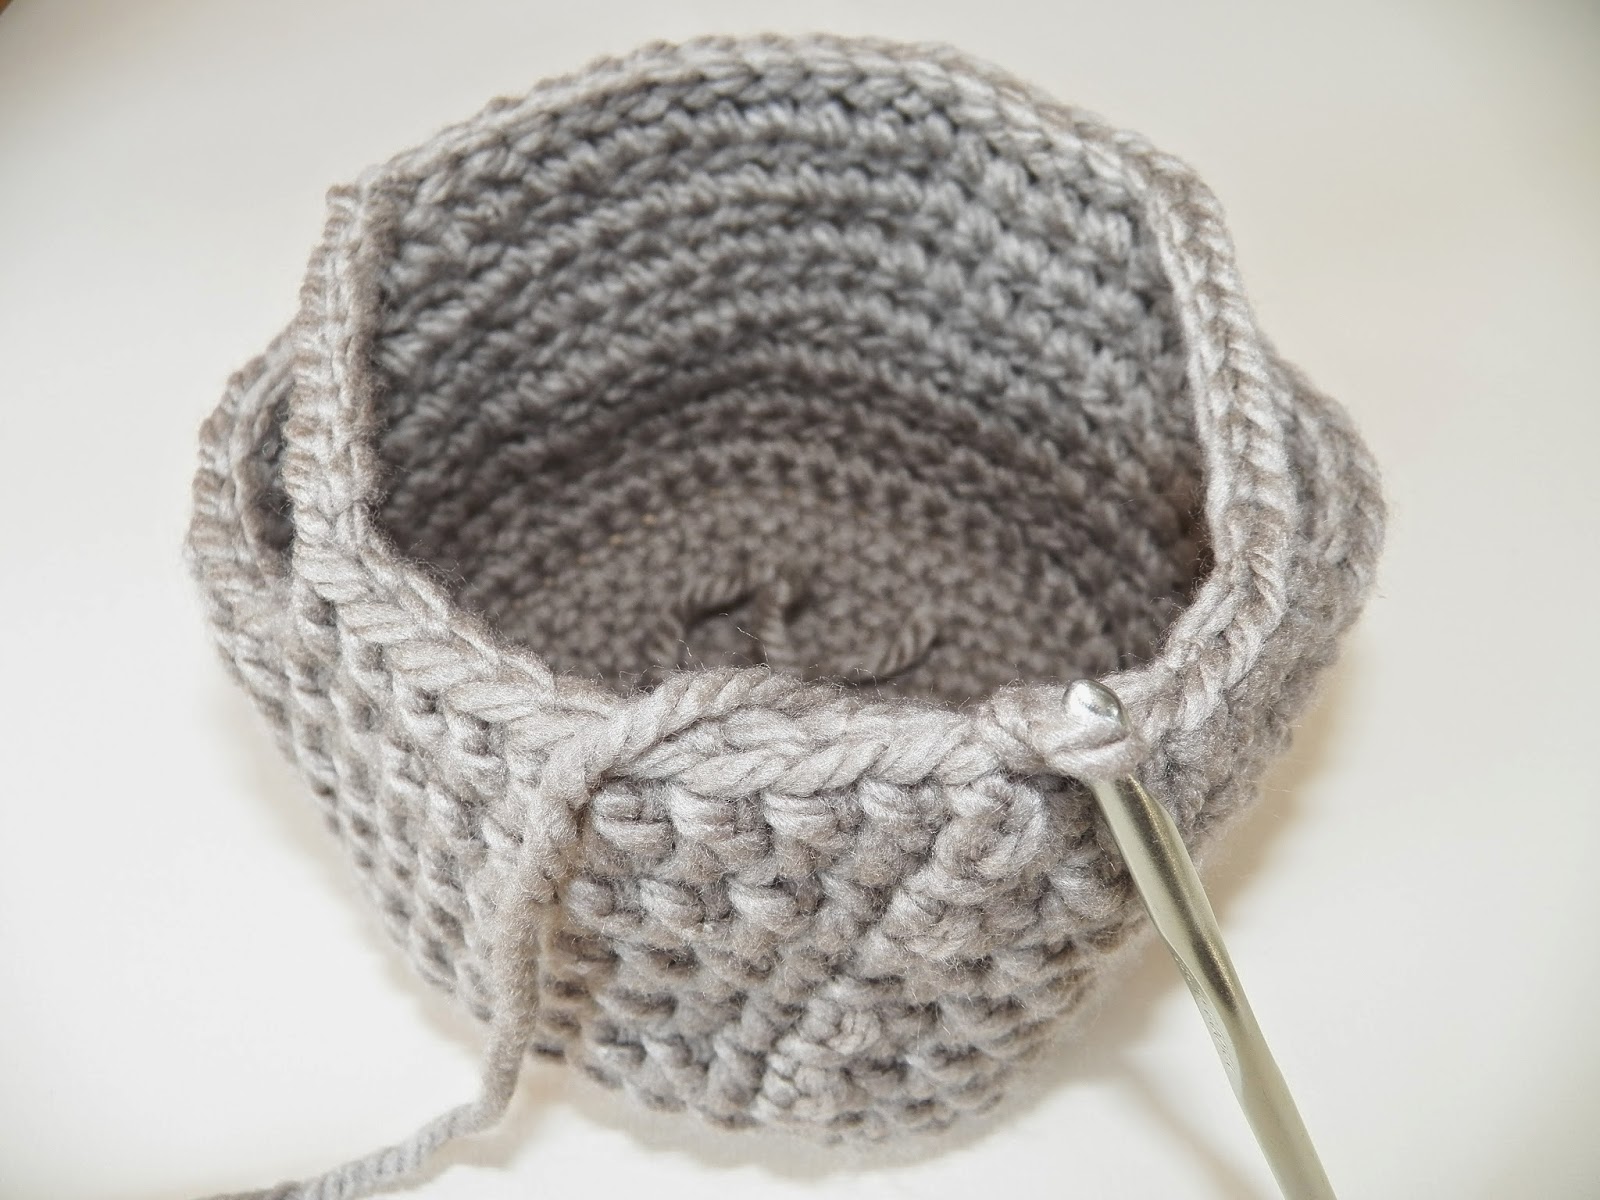
The entire basket is worked in rounds.  You will never turn your work. 
Tip: obviously, this is a flexible basket, but the tighter you crochet this, the sturdier it will be!


Rnd 1: Start with a magic ring.  Ch 1.  Work 6 sc into ring.  Pull string to close ring.
(here is a good photo tutorial on how to make a magic ring.)


Rnd 2: Work 2 sc into each stitch (12 total)


Use a stitch marker to mark the first stitch of each round.  Bottom of basket will be worked in spiral rounds with no joining stitches.  

Rnd 3: * 1 sc, inc * around (18 stitches total) 
(for the bottom of the this basket, the "inc" is working two single crochet into one stitch.)


Rnd 4: * 2 sc, inc * around (24 stitches total)

Rnd 5: * 3 sc, inc * around (30 stitches total)

Rnd 6: * 4 sc, inc * around (36 stitches total)

Rnd 7: * 5 sc, inc * around (42 stitches total)

Rnd 8: * 6 sc, inc * around (48 stitches total)


Rnd 9: (starts the sides of basket) sc into the back loop only of each stitch around (48 stitches total) 
(this is the only round in which you will crochet through just one loop.)


No need for the stitch marker anymore.  The sides of the basket will be joined.

Rnds 10 - 15  :  Ch 3, dc into next stitch and each stitch around.  Join with a sl st to the top of the beginning ch 3.  (these and all remaining stitches will be through both loops.)


Rnd 16: Ch 3, 8 dc, ch 9, skip 8 stitches, 17 dc, ch 9, skip 8 stitches, 7 dc, join with a sl st to the top of the beginning ch 3.


Rnd 17: Ch 1, sc  until you get to the chain, 12 dc onto the chain (in the space, not in the individual stitches), sc around to the next chain, 12 dc onto the chain, sc to the end, join with a sl st, finish off, weave in the end.  (For an "invisible" finish, check out this tutorial here. scroll down to "invisible finish") 


You're done!  

I like to use my baskets to carry my crochet projects around and to store my prayer books. My kids have confiscated the baskets that I've made "for myself" and have found a dozen different uses for them, including toy storage bin, purse, and ridiculous looking hat.

What will you use your basket for?!?


Tuesday, March 25, 2014

Hot Air Balloon Mobile :: Pattern and Tutorial


So, you want to make a hot air balloon mobile?  


(For more photos and a video of the mobile in action, 

My son loves this mobile, as do I.  Your baby is sure to love it, too!  (And I won't tell anyone if you're just making it for yourself because it's that awesome.)  
One of the fun things about this project is that it uses scrap-size fabrics and felt. I had everything I needed for it already on hand.  Dig through your scrap pile and use up your bits and pieces!

Let's get started!


(Photos included to hopefully make up for my woefully lacking descriptive instructions.)  

Here's what you'll need:

* Four printed fabrics and two coordinating colors of craft felt to go with each (a larger "main" color and a smaller "coordinating" color") (a small amount of each is sufficient!  approx. 9" x 6" pieces of each)
* white, cream, brown craft felt
* Craft thread or embroidery floss (colors that coordinate with main balloon colors, as well as white and brown)
* Approx. 2 yards of light blue grosgrain ribbon (3/8" width)
* Fabric adhesive (I used Fabri Tac)
* Misc. items: needle, straight pins, scissors, iron

* Pattern pieces (download here), cut out


(1) Attach Heat n' Bond (according to instructions on package):

* iron a 5" x 8" piece of Heat n' Bond to the wrong/back side of each piece of printed fabric

* iron a 5" x 5" piece of Heat n' Bond to each of the "coordinating" felt colors (the small pieces that are the center of each balloon)


(2) Pin Pattern Pieces and Cut:

Pattern Piece 1 - two of each "main" color felt (8 total)

* Pattern Piece 2 - two of each printed fabric with Heat n' Bond backing (8 total)

Pattern Piece 3 - two of each coordinating felt color with Heat n' Bond backing  (8 total)

* Pattern Piece 4 - four from the cream felt

* Pattern Piece 5 - four from the brown felt

* Pattern Piece 6 - fold white felt in half, cut three.  (six total)

* Cut four 12" lengths of ribbon (or whatever length you desire)


(3) "Build" the Balloons:

* according to instructions on Heat n' Bond, attach printed fabrics to the main felt colors

* attach smaller coordinating felt pieces to center of printed pieces  


(Note: if you leave the iron sitting on the craft felt for too long it will melt.  However, as you can see from the pictures, I did not have any problem using the iron on the felt pieces as long as I kept the steam off and kept the iron moving.)

* fold brown felt piece to form a square - for the "gondola," or passenger basket. Slip it up over the bottom (narrower end) of the cream felt and glue in place (use a dab of glue on front and back)

*  Lay the balloon pieces together right sides facing out. Use fabric adhesive to glue cream felt piece in between the balloons (at the bottom.)


(4) Sew balloons:

* blanket stitch or whip stitch the sides of the brown "gondolas" together using brown thread


* Using coordinating color thread, begin sewing balloons together at the base using a simple running stitch.  Stop when you reach the top, not quite to the center.  

* Glue approximately one inch of ribbon in between the balloon front and back.  Continue sewing around, being sure to pass the needle through the ribbon at the top.  

(NOTE: I tied my thread off so that the beginning and ending knots were hidden inside the two balloon pieces.)


(5) Attach clouds:

* approximately 1 - 1 1/2" above three of the balloons, glue cloud pieces to either side of the ribbon.  

* With the white thread, use a running stitch to stitch around the clouds, passing the needle through the ribbon both at the top and bottom.    


(6) Yay!  You're done!


* Determine how you will hang your mobile.  I tied knots in the tops of my ribbon and replaced the uninspired flowers that were on the mobile of my son's Graco swing.  


My daughter has asked for a similar mobile for her room.  For a mobile that will hang from the ceiling, I think I will use longer ribbon that is fed at the top through an embroidery hoop.  How will you hang your hot air balloon mobile??

Happy crafting!

** If you make a mobile from my pattern I'd love to hear about it!  If you Pin It or blog about it please link back to my original idea!  Thank you, kindly.

** Please let me know if you have any questions about the tutorial or if you have suggestions on ways I could make the instructions clearer.  


Related Posts Plugin for WordPress, Blogger...