Showing posts with label experiments. Show all posts

Thursday, February 28, 2013

Bird Feeders (Keep-It-Simple Science Gone Awry)

I had such high hopes for bird watching this winter.  So we made our own bird feeders - little gems mined from Pinterest - and used two kinds of feed thinking it would improve our chances of attracting a variety of birds.  And then I set my expectations way up there - I wanted to see cardinals, wood peckers, and chickadees at our windows on the first day, and maybe even that hawk I've seen around here lately.  I wouldn't mind him swooping in to pick off an unsuspecting sparrow.  (It's not cruel,  it's -cue Elton John here- "the ciiiiiiiircle, the circle of life!") 

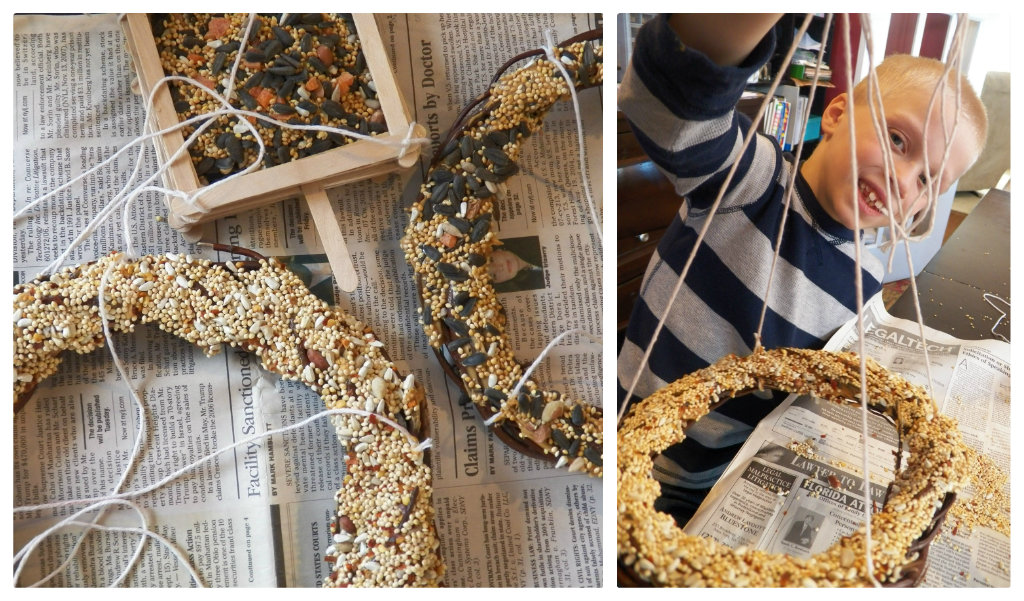
Making the bird feeders went very well.  We had lots of messy fun... and we vacuumed a lot. 

Then my fabulous husband said of course he would get out the ladder and go out in the cold and hang the feeders at different windows all around the house.  *love*

Then we got out our bird guides and a lovely library find, Backyard Birds of Winter.  

And then we waited.  And waited.  And no birds came.  And my windows got pretty gunked up with peanut butter (it's like the smelly paperwhites... I'm willing to suffer for science...).  And then the squirrels came.  I wasn't surprised since we spent the better part of the Fall intentionally luring squirrels to our patio door... but the bird feeders were hung in areas that required the squirrels to scale the actual walls of our house, not just skitter across the deck.  Time to take the bird feeders down... because it just feels a little too creepy to have a squirrel crawling on the walls of my home.  (Squirrels eating nuts on our deck are cute... squirrels crawling on the walls of my home become rats with fluffy tails and it is not ok.  I will not suffer rats, even for the sake of science.)
(would you be so good as to overlook the poor quality of these pictures... it's tricky to get a good shot of a moving squirrel through a peanut butter smeared window)

Our last ditch effort was to move one feeder to a little tree outside one window.  Cute idea, but then the  bottom fell out of it - probably an engineering oversight on my part.  Bird watching was just not meant to be this winter.  My children were a little disappointed, but have already begun making plans for different types of feeders for next year.  I guess we'll try again next year, but I sure could use a little encouragement and advice in this department if you have any to offer.  Please?

Sunday, February 24, 2013

Growing Winter Flowers (Keep-it-Simple Science)


Simple.  Simple.  Simple.  

This is the second year that we've grown amaryllis and paperwhites during the winter.  Last year it was more a part of our Christmas celebrating and decorating, but this year I sort of forgot we had the bulbs until after the New Year.  So, with the holidays over and bulbs still waiting to be planted, it naturally meant that it would be a part of school, (I'm very liberal with the term "school" and pretty much slap that label on whatever fun activities we do around here.)  

If you've never grown these winter flowers in your home plan on it for it next year!  The $5 kits sold in stores in the months before Christmas are totally sufficient. (I use my own nice pots though, instead of the light-weight easy-to-tip-over brown plastic pots that they give you.)  The best part of these plants, especially for little kids, is that they grow so quickly, you can literally see change from morning to night.  Kids that might otherwise lose patience with another "growing" project will see speedy results with this one.  And it's fun to get some indoor gardening practice even while the garden outside alternates between frozen and muddy.  

Last year I remember we got two or three giant amaryllis blooms.  This year, we waited a little too long to plant the amaryllis so I don't think we'll get any blooms, but our paperwhites have delivered as expected!  We've kept a ruler next to the plants and have used it frequently.  The kids have often measurd the paperwhites in the morning, watered them, then measured again in the afternoon - one day there was an inch of growth during the day!  And of course, there's the unbridled excitement that runs through the house on the morning when we wake up and spot the first peek of a white petal poking through!  I'm thinking that next year I might have the kids record the measurements and watering schedules in their science binders and have them include photos that they take or sketches that they do of the flowers.  


Some ideas to make it more science-y: guess how many days it will be from planting till the first bloom; some bulbs already have little shoots - will the furthest along at planting time be the first to bloom?; does the "pod" of each paperwhite produce the same number of blooms?  all at one time?  do some die before the others can bloom?;  what happens to the plants if you rotate the pot every couple of days?; grow a plant near a window and one in a dim corner and compare the progress.  Kids eat this stuff up :)  Or at least mine do...  And for that, I am grateful.  

It's so simple.  And it's science.  And it makes your home look flowery-lovely in the winter. (The only down side is - however, the benefits are such that I'm trying to ignore it - paperwhite blossoms really stink!)  


Saturday, February 9, 2013

Snow Ice Cream

It snowed something like 10 inches yesterday,,, steady snow all day long.  (Could little kids ask for anything better on a February Friday???)  After tons of shoveling, snow angels, and snowballs the kids came in and we made snow ice cream.  I was going to write about it last night, but the pictures I took of the event were rubbish.  "Darn... I'll have to make it again tomorrow," I thought.  So I did, and here it is!


You will need:

1 c. milk
1/2 c. sugar
1/2 T. vanilla
snow!

two nested bowls
pot
salt
potato masher or other mixer

*  Gather all your ingredients and supplies before you being (including your boots ready to go near the door!)...  


* In the smaller of the nesting bowls, mix the milk, sugar, and vanilla until frothy
* Bring the larger bowl and a pot for snow outside.  Fill the pot with the snow that will become your ice cream.    Fill the bowl half way, and while outside, press the snow down to cover the bottom and sides of the bowl.


* Head back inside... and work quickly now that you've got the snow in the warm house!  


* Cover the snow in the larger bowl with salt. (I've read that rock salt works better, but I used table salt.)   Place the smaller bowl with the milk mixture onto the salty snow in the larger bowl.


* Begin adding snow to the mixture, using the potato masher to blend it.  Add until desired consistency.


* Serve it up right away.  You can store it in the freezer, but it's not as good :)


Enjoy your frozen treat!  
And don't forget - there's always some way to enjoy the season, even in the middle of February!


fyi:
When you are making ice cream, the temperature around the ice cream mixture needs to be lower than 32 F if you want the mixture to freeze. Salt mixed with ice creates a brine that has a temperature lower than 32 F. When you add salt to the ice water, you lower the melting temperature of the ice down to 0 F or so. The brine is so cold that it easily freezes the ice cream mixture. (from howstuffworks.com)


Friday, February 8, 2013

Cloud in a Bottle Experiment (Keep-it-Simple Science)

We haven't been using any specific Science program or textbook this year.  Reason 1: the textbooks I previewed looked dull.  Reason 2: we live in a wonderful fantastic world and my husband and I try to be very intentional about training ourselves and our children to see it, to observe and study it, to appreciate it, and to recognize the glory and wisdom of God in it all.  I'm sure as the years pass we'll need a more official science text or program, but for now we take hikes, collect nature, grow plants, use our magnifying glasses, and conduct simple experiments around the home (often impromptu).

Because science is one of the subjects that we keep kind of loosey-goosey, and it's largely based on our interests and the availability of resources, I think I might start keeping a record of it here - to share with you some of what we do, and for my own reference since I don't have a book with an index!  And so I start Keep-it-Simple Science.


To help pass the winter days, the boys have been going to a weekly program for homeschoolers at our local science museum.  Last week, they came home with the instructions for this experiment: A Cloud in a Bottle.
   
STEP 1: Gather supplies - 2 liter bottle with cap, matches.  Have your kids blow into
the bottle to get all the dents out... this is really just a time-waster so you can
grab the matches and the camera.


STEPS 2 and 3: take the label off the bottle and fill the bottle 1/3 full of warmish hottish water


STEP 4: put the cap on the bottle and squeeze it.  Nothing happens.

Temporarily suspend experiment for a funny picture.

STEP 5: while holding the camera and taking pictures with one hand,
light a match, hold it over the opening of the bottle for a few seconds,
then drop it in.  Replace the bottle cap immediately.

STEP 6: squeeze the bottle again and see a "cloud"
form as you release and change the air pressure in the bottle.
I could not capture the "cloud" in a photo, but it did work!

Explanation: The warm water evaporating provides water vapor inside the bottle.  The smoke particles from the match enhance the process of water condensation, and squeezing the bottle causes the air pressure to drop - the three ingredients needed for a cloud to form.

Experiment was from weatherwizkids.com - more info there on what forms a cloud and why the experiment works!  (I think we're going to try the make-your-own fog experiment tomorrow!)  
Related Posts Plugin for WordPress, Blogger...